
Warm weather and sunshine have helped seedlings to grow fast into young plants. As we reach the start of May, what are the next steps and how do we know whether the plants are ready? Plus, how to spot some common problems at a glance and what to do about them.

The unusually fabulous weather we had through most of April has been a huge boost to morale. Not only did it help to take many of our minds off coronavirus, but it has also meant we can spend more time outside our houses, in the garden for those of us who have one. From a veg growing perspective the real advantage has been the way warm weather and sunshine have been optimising growth, so all those precious seedlings have been shooting away so fast you can almost watch them growing.
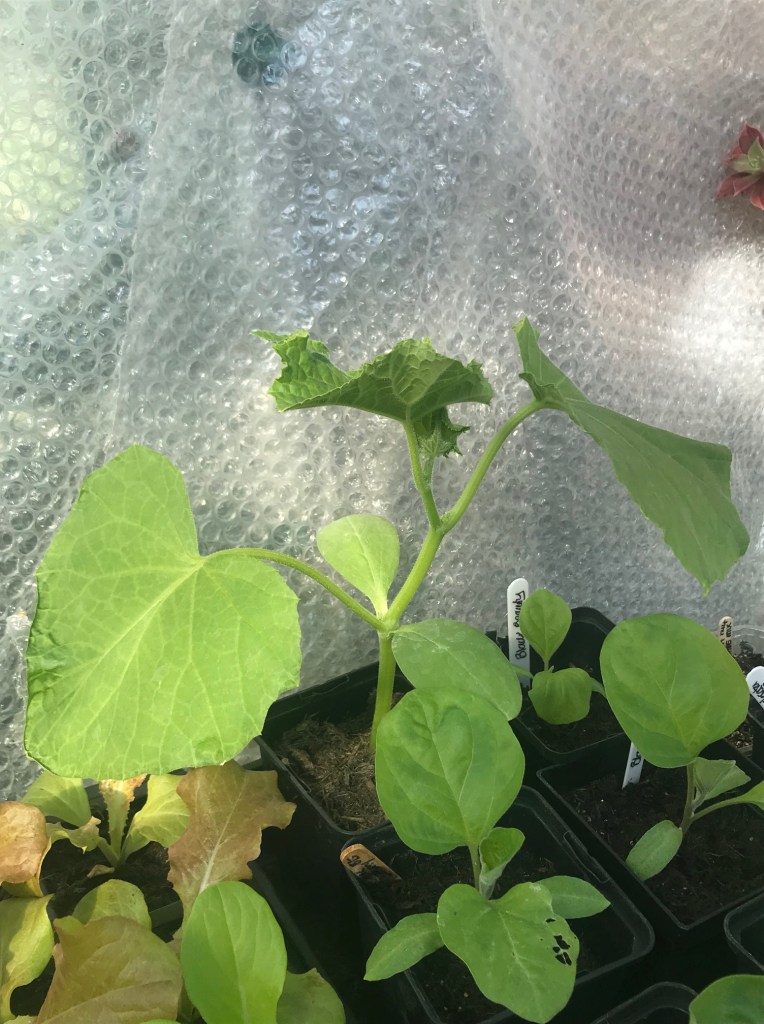
Quick growth gives you a couple of things to think about. As I prick things out into pots and modules, I normally have to cram the trays and pots onto my greenhouse shelves so I can fit everything in. This is fine when the plants are small, but as they grow it’s not so good.
Just like people during a pandemic, plants need to practise some social distancing to avoid diseases spreading quickly. If leaves are touching and there’s little room for the air to move, fungal diseases are much more likely to start and to spread quickly. Also tightly packed plants will become lanky as they head upwards to find the light, while what you really want are sturdy plants that grow evenly.
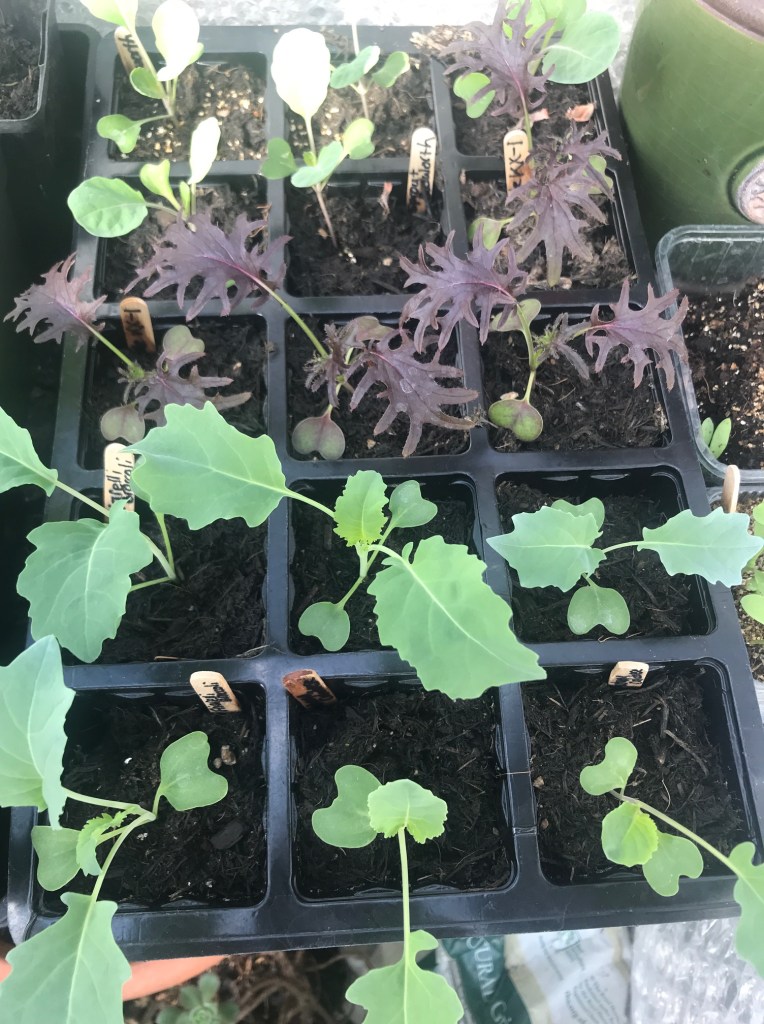
So you need to get creative with your space and give everything a bit more room. The hardier types of vegetable can be moved outside now, so trays of leeks, onions and brassicas could go into a cold frame if you’ve got one, or be moved to a sheltered spot near the house, then you can space out what remains inside.
Almost as soon as you’ve sorted out the spacing problems, you’ll need to start thinking about moving the plants on to their final growing places, whether that’s planting outside or going into pots or growbags. But how do you know when they’re ready?
Checking root growth
Although the size of the leafy parts of the plant are a good indicator of many things, it really helps to check the size and development of the roots when thinking about the best time to pot on or plant out. A well-developed root system is what you’re after, with roots touching the sides and bottom and holding the compost together firmly. Underdeveloped roots are more easily damaged when the plant is moved and overdeveloped ones that have become badly pot-bound can fail to root out properly so growth is slowed, and plants might never establish properly. So, when I can see that top growth is progressing well, I start checking the roots to see whether they have advanced as quickly.
Lift up the pot and look underneath. Can you see the root tips in the holes? If you can then it’s a good sign that the roots are filling out. Sometimes roots might be growing through the holes, especially if you’ve got your plants on capillary matting or in a tray where water has collected, as they gone to find the moisture. To be sure they have rooted throughout the compost and not just escaped through the bottom, I normally very gently tap out one or two of the rootballs to get a better look.
This is how to do it:-
- Put one had across the top of the pot, with the plant between two fingers. Squeeze the pot sides lightly with the other hand and gently ease the plant and pot apart.
- If the compost starts to crumble as you pull the plant, stop trying to move it. The roots almost certainly haven’t developed enough yet and you don’t want to damage them. If the compost and roots slide out easily then you can safely look at them.
- What you want to see is that the roots have spread throughout the compost and reached the sides of the pot. The compost should be held in the place by the roots.
- If the plant is stuck inside the pot and squeezing the pot sides gently doesn’t free it, don’t force it. The chances are the roots are becoming pot bound so think about planting out as soon as possible. Don’t risk damaging them twice by forcing them out now, wait until you’re about to plant out and put a bit more strength behind getting them out then.
If your plants are in modules it’s a bit more difficult to check the roots but the principle is the same. Lift the modules at the corner and have a look underneath to see whether the roots are coming out of the bottom.
- If you can see root tips gently hold the stem of the plant, give the module a little squeeze and try to lift the plant so you can get a better look. As with the potted plants, don’t force anything and stop if the compost starts to crumble.

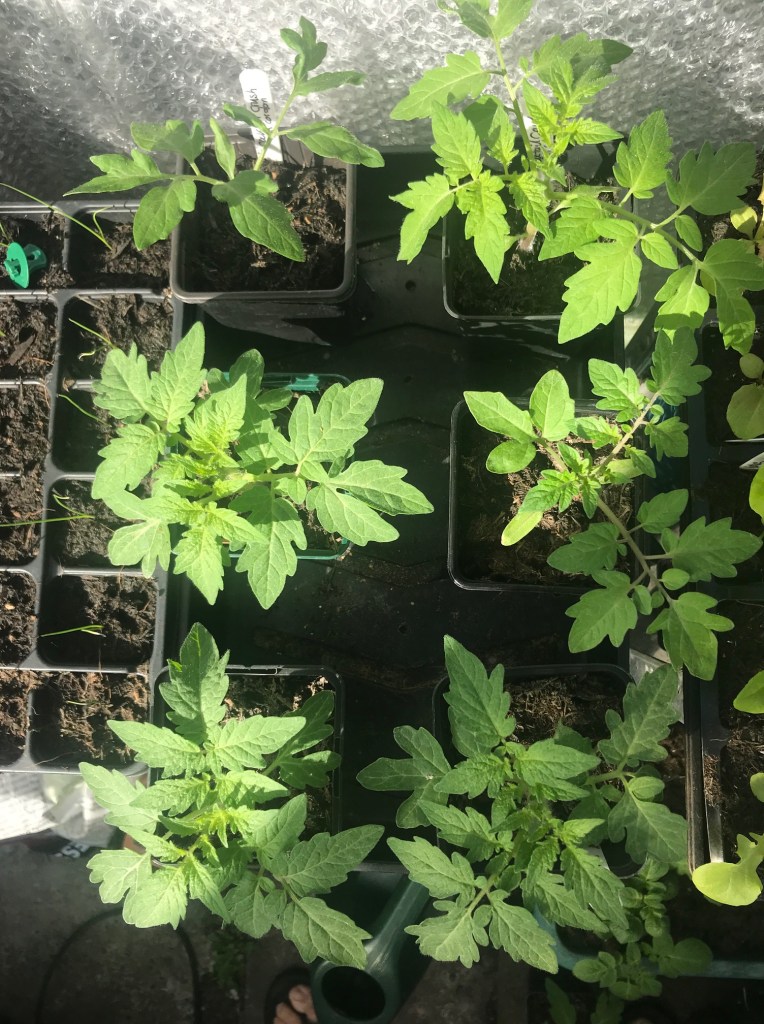
When I checked all my young plants on 26th April, nothing was quite ready although the tomatoes are nearly there. That’s fine, because since then the weather has turned cooler and we’ve finally had some rain. I’d rather plant into damp soil when the weather is warmer again, so I’m not in a hurry to plant anything outside yet.
Plus, of course, I need to harden things off before I put them out.
Hardening off
This isn’t a quick process, you need to allow a week at least and two weeks is better, especially at this time of year (end of April/start of May) when the nights can still be cold and frosts are possible in most parts of the country. Once you get into late May and June it’s less important and can be sped up a bit.
Hardening off properly is arguably most important with tender plants you’ve been cossetting up until now, but if you’ve been growing on a windowsill or in a greenhouse (even an unheated one), you will need to get all your plants used to outside temperatures before you plant anything in the ground or put pots outside for the summer. Even hardy plants need to be given time to adjust to colder temperatures or it can throw the plants into shock and stop them growing.
Moving plants into a cold frame is the ideal way as you can open the lid during the day and close it at night, then gradually start leaving it open at night as well, as long as no frosts are forecast. I’ve got an upright shelving unit that came with a zipped plastic cover, and that works as well. Having said that, I lost the cover a long time ago so now I just shift trays outside during the day and pop them back in my greenhouse at night for a week, then start leaving them out at night unless it’s set to go a bit colder than usual, in which case I might bring them in again until it’s a bit warmer. You need to keep an eye on the forecast and be prepared to move things around if the weather changes – which it tends to quite a lot in spring!
Planting out
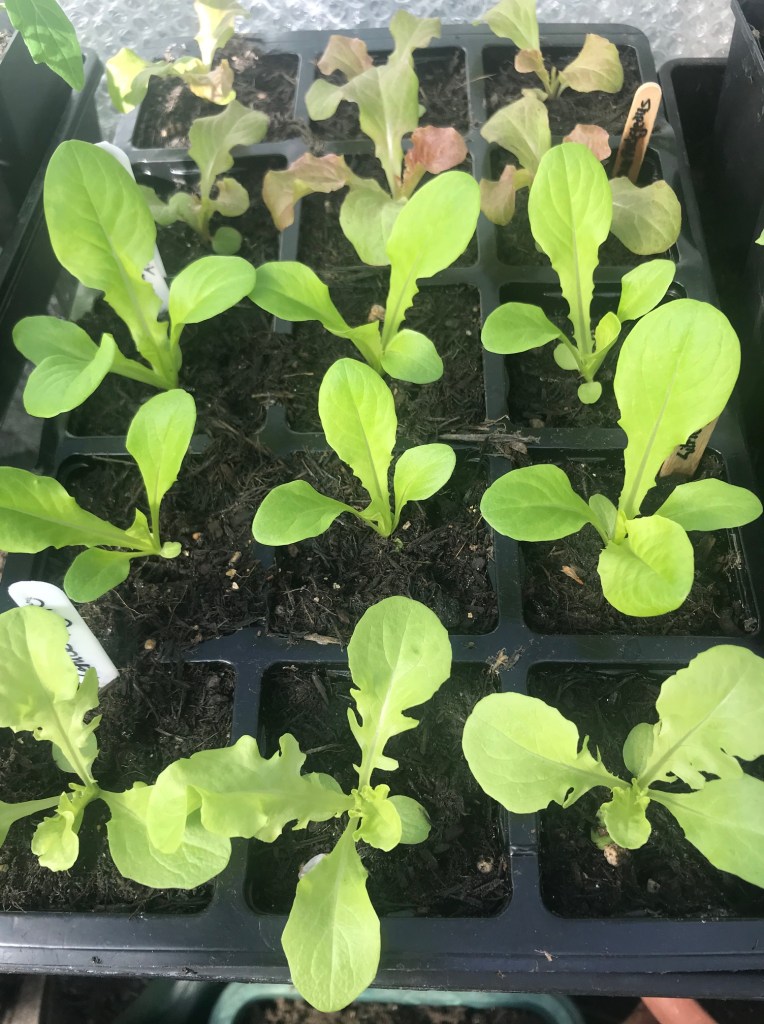
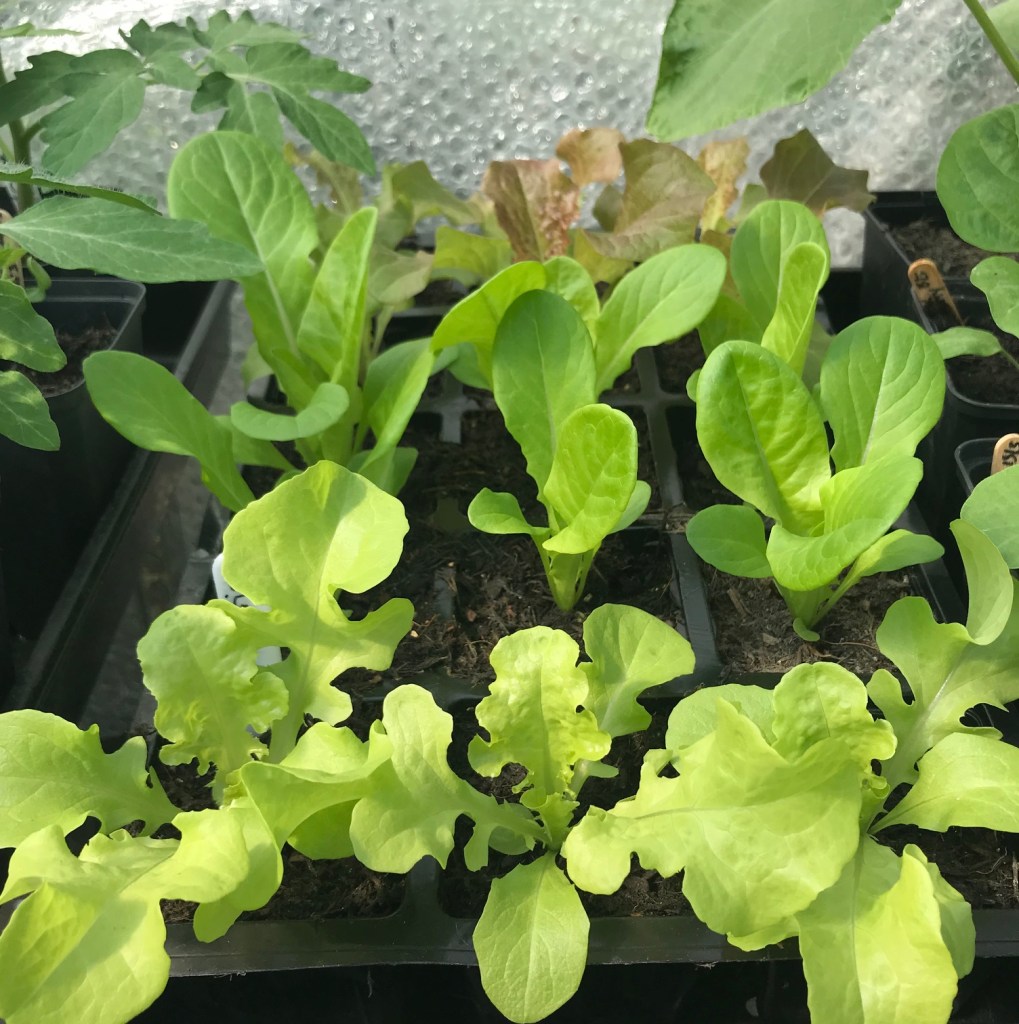
I will usually start planting out the hardier veg types first, especially if they’re ready in late April or early May when tender stuff needs to be kept inside a bit longer. So I’ll take all the brassica and lettuce plants, the onions and the leeks down to the allotment first and get them in the ground. I keep some cut and come again lettuce, rocket and pea shoots in pots in the garden.
As soon as I’ve got the space, I’ll start potting up tomatoes, peppers and aubergines which are going to be grown in the greenhouse. I use 10-12 litre pots for tomatoes, or plant two in a grow bag. Aubergines and peppers fruit better in slightly smaller pots – 7 or 8 litres is fine (around 25cm diameter), or plant three to a growbag.
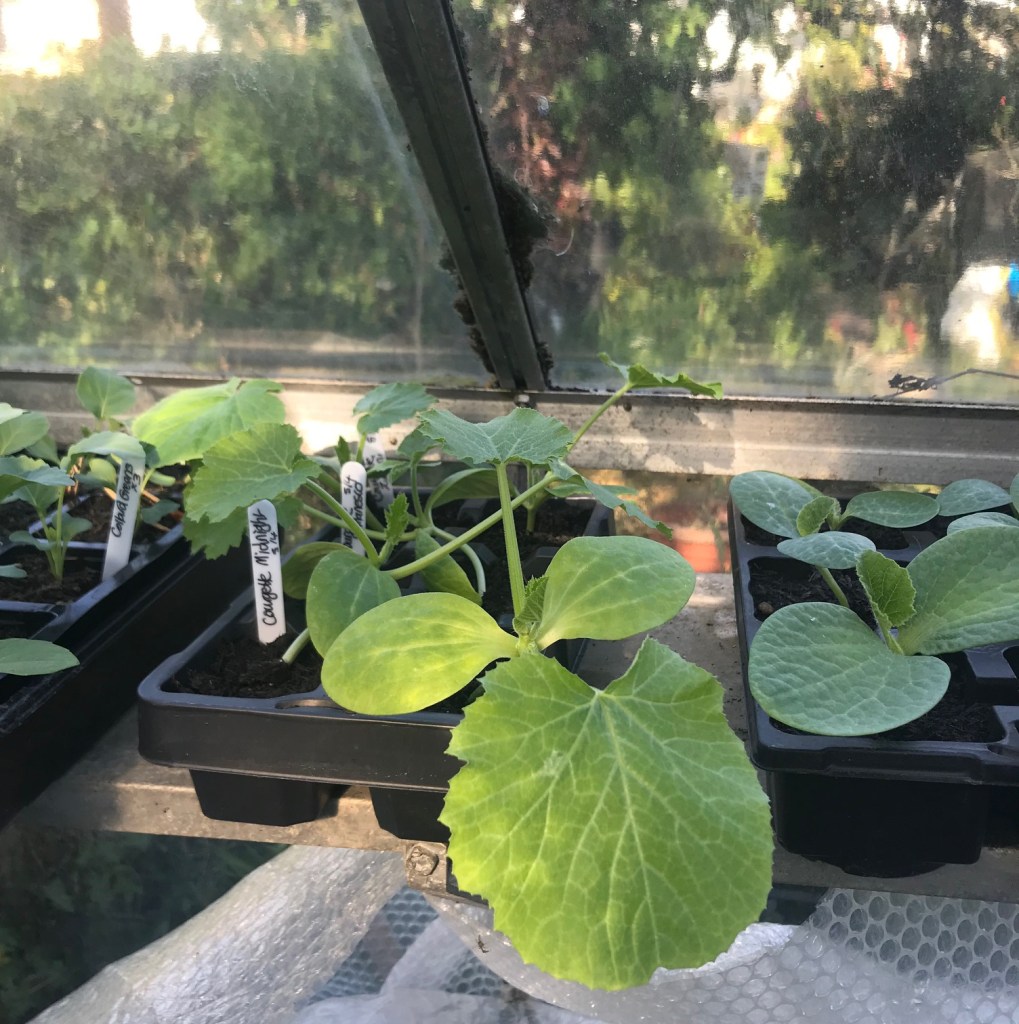
Courgettes and squash will be going in the ground at the allotment, although I’ll probably keep one or two courgettes in pots in the garden so they’re handy for picking while small.
Runner beans and dwarf green beans will mostly go into the ground at the allotment, although again I might keep some in pots at home as well.
I also grow tomatoes outside on the allotment, planting these out after mid May. I am a huge fan of blight resistant varieties such as ‘Crimson Crush’, ‘Oh Happy Day’ and ‘Lizzano’ (which isn’t quite as resistant as the others). This year I’m also trying a couple of new blight resistant ones – ‘Cocktail Crush’ and ‘Consuello’.
The last thing I plant will normally be sweetcorn which I like to put in when the soil is nice and warm.
I’ll be writing more about all of this in later blogs.
Young plants – warning signs and how to spot them
Growing plants is exciting and great fun, especially when things are going well. Unfortunately, there are a few things that can go wrong and a few little wrinkles that it really helps to know about. If you learn to spot the first signs of problems you can get on top of them quickly, before they become disasters.
Here’s what to look for:
Plants that need watering
It seems obvious to say that you need to water plants, but It isn’t always as straightforward as it sounds. When the weather is as warm and sunny seedlings with small root systems and young plants in small modules and pots dry out very quickly. You might not spot that the compost has dried out straight away and it can be hard to tell with some peat free composts which can look dry on top but still be damp underneath. Instead it’s a lot quicker to look at the leaves. Look at them regularly and get to know what a plump, well-watered leaf looks like, then you’ll start to notice when they don’t look so happy. If leaves are looking more droopy or limp than usual, stick your finger in the compost to check whether its dry and if it is, water straight away.

Does it matter that much? Well, some plants don’t mind going short of water, but others do. Cucumbers, for instance, don’t like going short of water and later on will tend to stop fruiting, at least temporarily, if they’re allowed to dry out. The trick is to keep all your plants growing smoothly, with as few checks to their growth as possible. You will reap the rewards for your vigilance in better crops later on.

Plants that need feeding
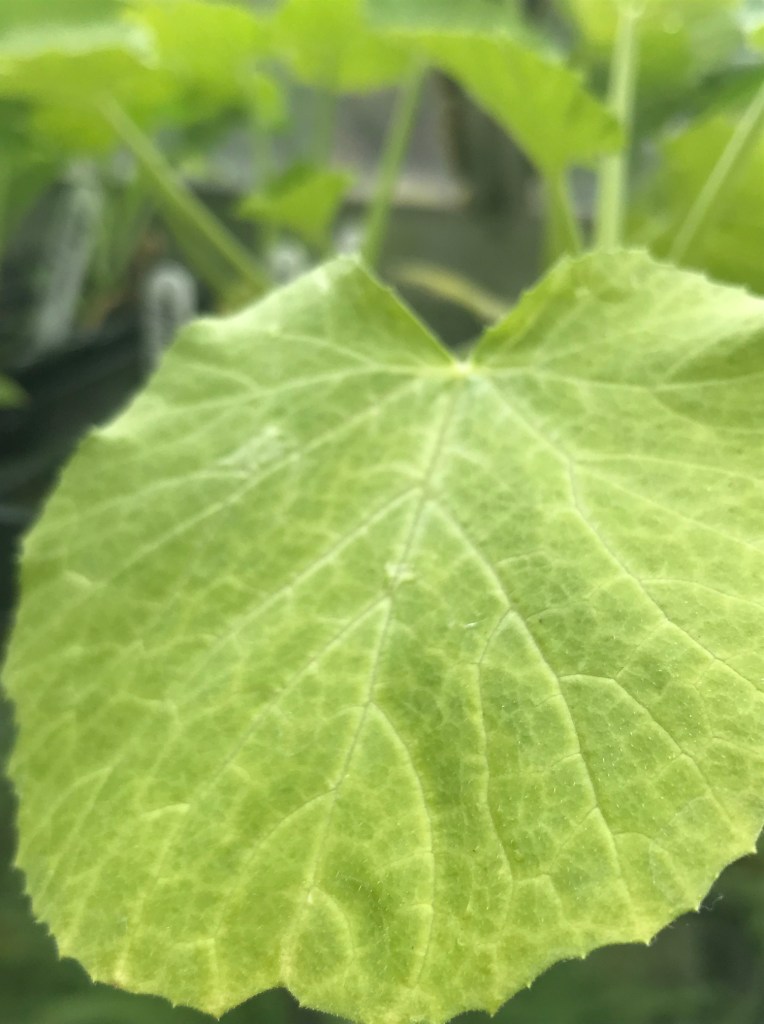
Most bagged compost should have enough fertiliser in it to last for up to six weeks without you adding more. But you can’t rely on this. Frequent watering, fast growth, a delay in planting something out; all these things can lead to plants lacking the nutrients they need, and the leaves will tell you this is happening.
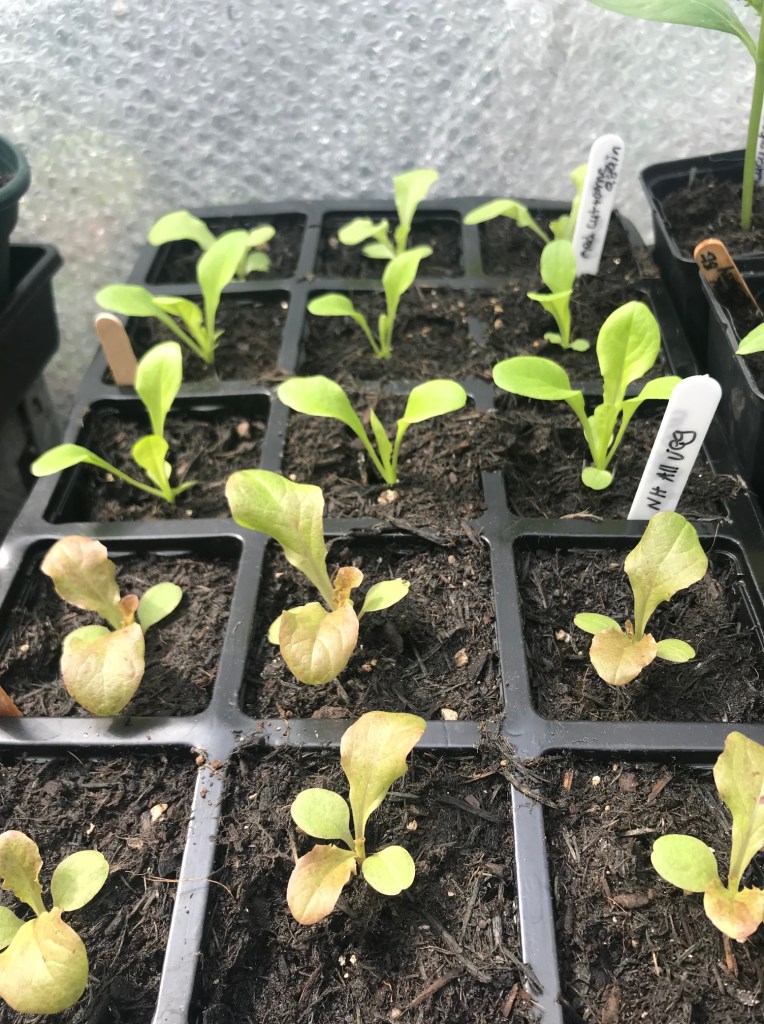
Pale or yellowing leaves are often a sign of nutrient deficiencies, and although it’s not always that simple (some diseases and viruses can lead to similar symptoms), it’s a good place to start. In fact, my first reaction to yellowing leaves is to check the compost isn’t either saturated or too dry but if that’s not the problem and I know lack of nutrients could be an issue, I’ll give a liquid feed. Seaweed fertilisers are good because they’re fast acting and contain a good mix of nutrients including nitrogen which you need for nice green leaves. If the only thing you’ve got is tomato feed, though, use that. Always follow pack instructions when you dilute and apply the feed, as over feeding can also damage plants.
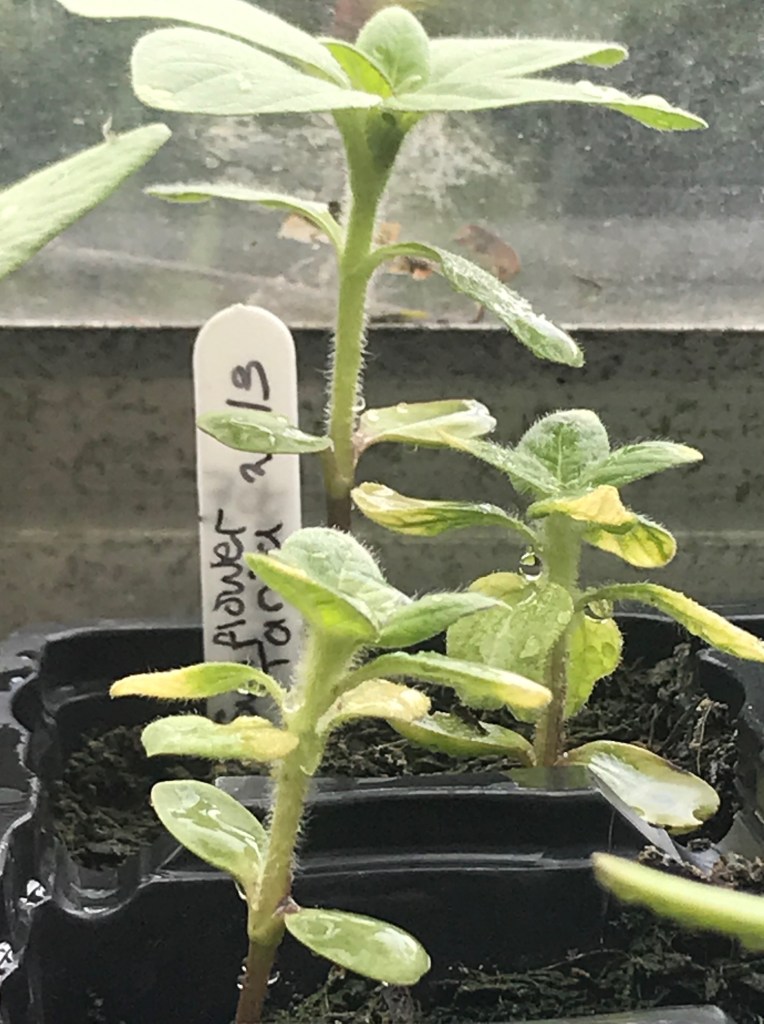
Stunted growth is something else to watch out for, and is also best dealt with quickly. While this could also be caused by other problems with the compost such as pH balance, it’s best to go through the same steps – check the compost isn’t too wet or too dry first, then feed and see if they improve.
Insects and diseases
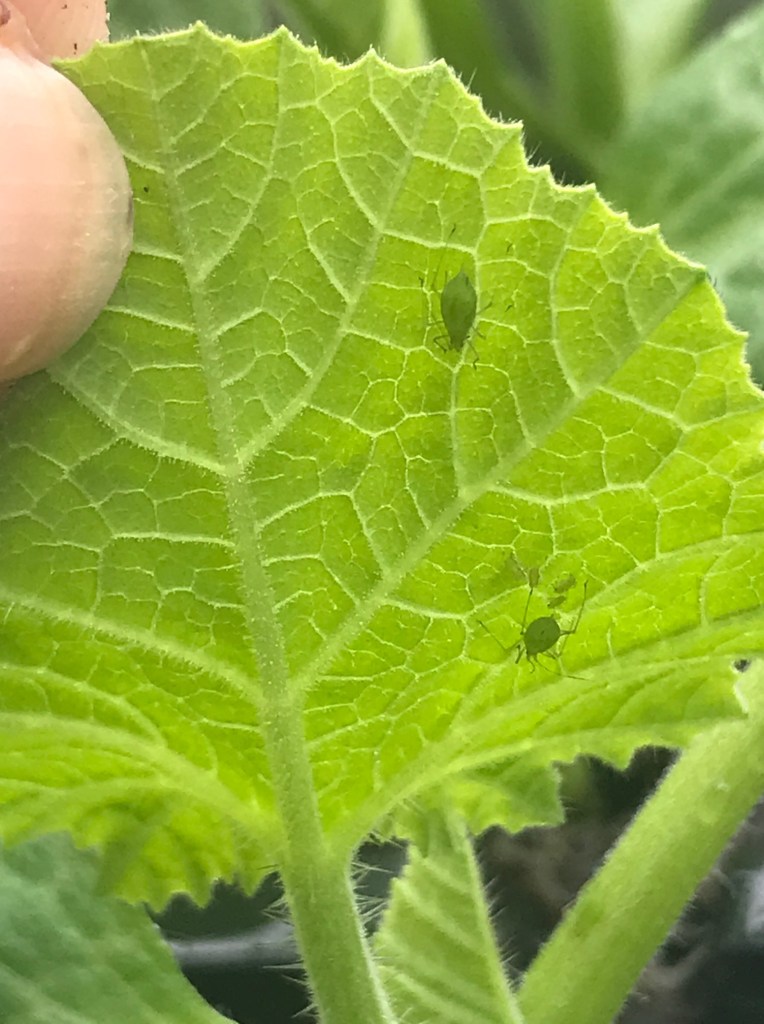
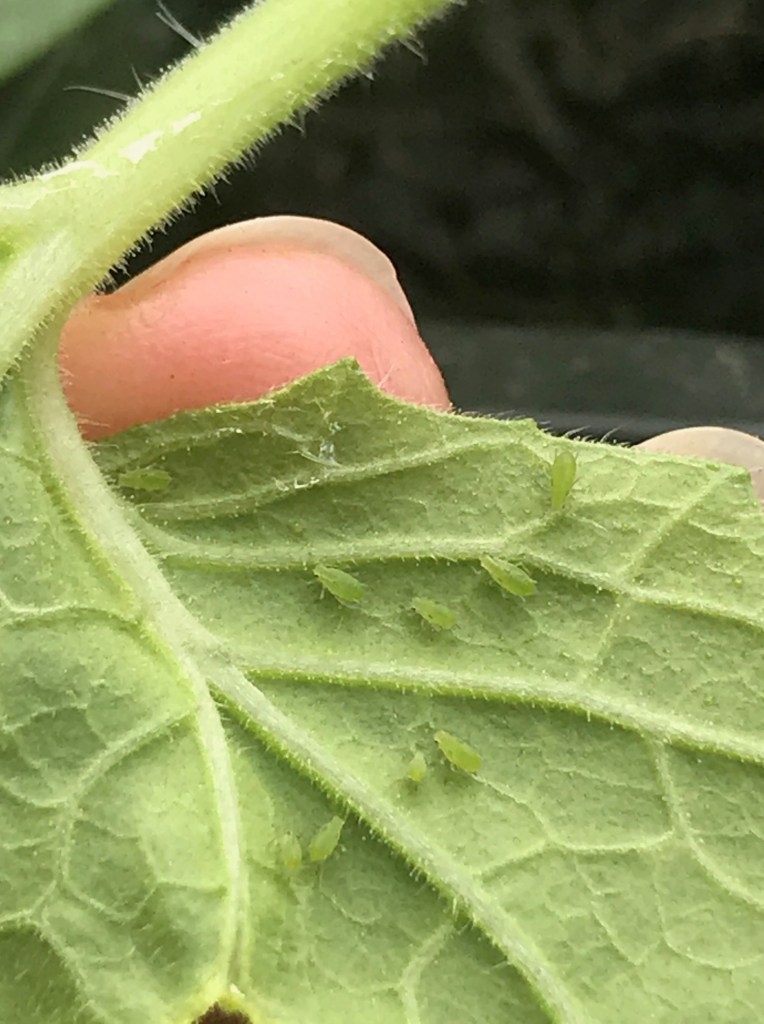
Aphids and whitefly can strike surprisingly early in the year. They cluster on growing points and underneath leaves, sucking sap and weakening young plants. There are some early warning signs to look for:
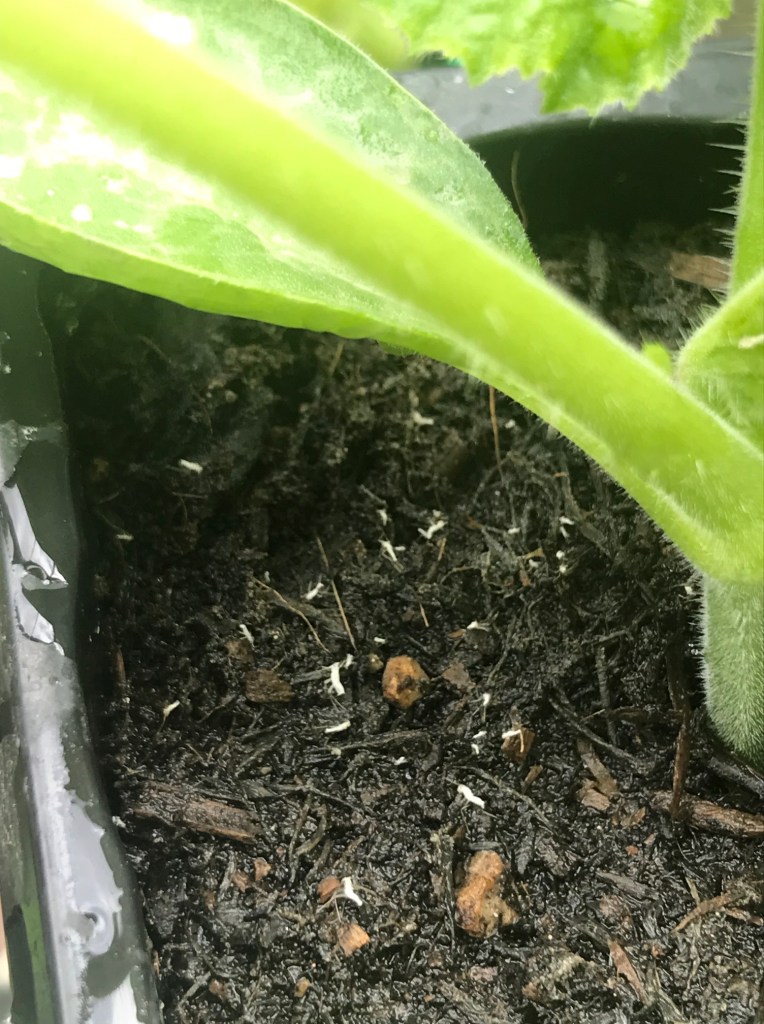
‘Plant dandruff’ on the compost. As aphids grow they discard their skin several times and this falls onto the surface of leaves and onto the compost where it’s very visible, making a good tell-tale sign of the early stages of an infestation. Check underneath the leaves and you’ll find the little blighters happily feeding and breeding. A few aphids soon become a large colony (they are borne pregnant) so at this point I gently but ruthlessly squish every single last one of them I can find.
Whitefly can be another big problem in greenhouses and can crop up on windowsills as well. Hidden away under leaves or at growing tips, like aphids they can do a lot of damage before you know they’re there. Check the undersides of leaves and watch out for the small, pale green rounded scales – an early stage in the whitefly life cycle, which will be clustered around veins and growing points. Give your plants a little shake from time to time – any adult whitefly will take off and you’ll spot them. Squish all of them and keep checking to make sure you got them all.
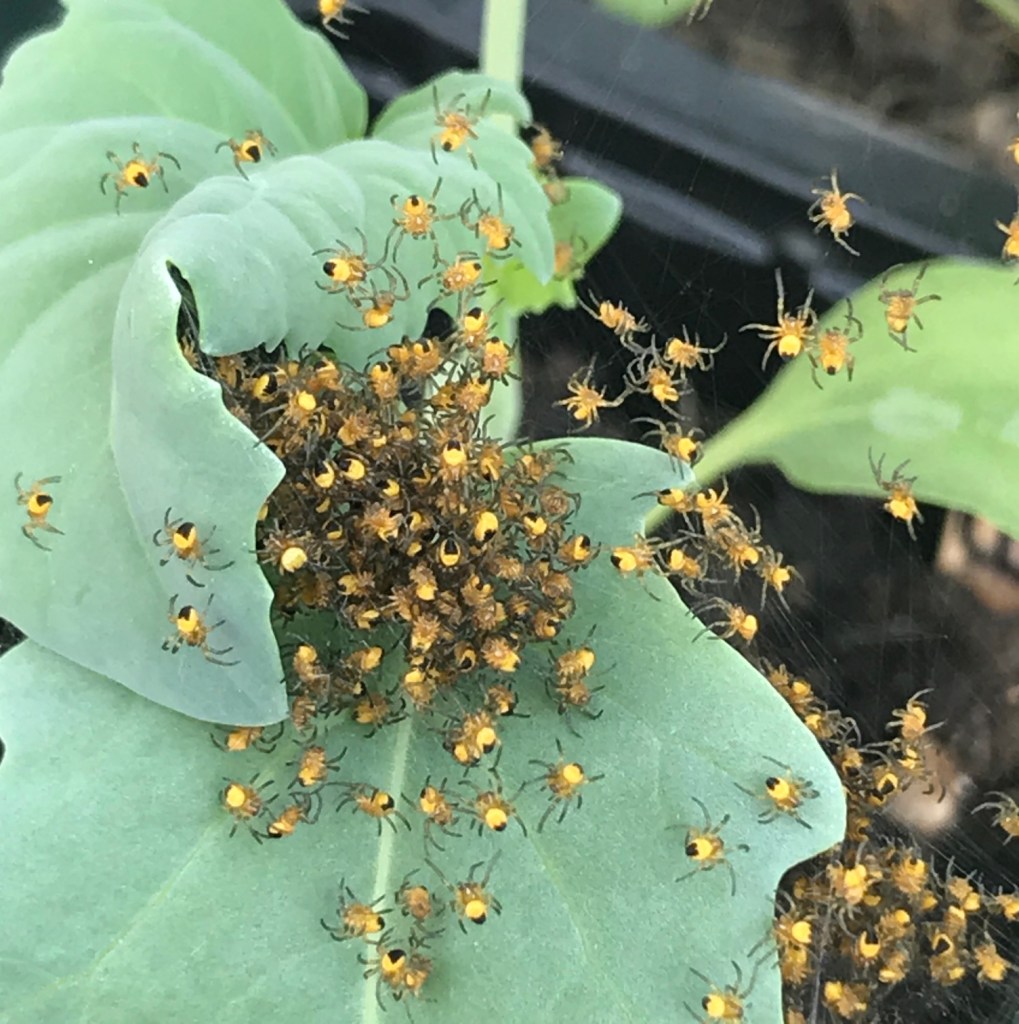
And one happy discovery
Categories: Grow veg, Uncategorized
